Ksama Arora
Create a basic pipeline in Azure ML Studio - Lab 3
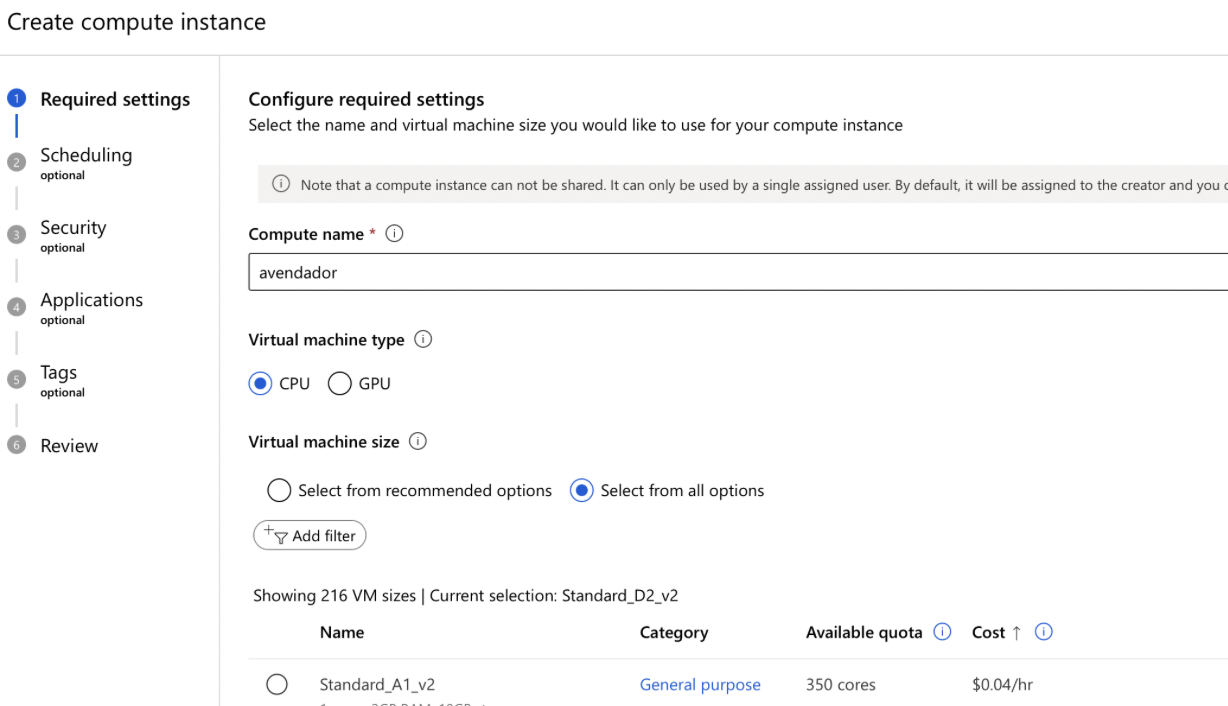
Set Up Compute Resource:
- Go to Azure ML Studio: Navigate to the Azure Machine Learning Studio.
- Create a Compute: Set up a new compute resource.
- Name the Compute: Provide a name for your compute instance.
- Choose the Compute Type: Select the appropriate compute type based on your requirements.
- Configure the Compute: Adjust settings such as the size and region.
- Create the Compute: Click on the ‘Create’ button to provision the compute resource.
Create a New Classic Pipeline:
- Go to Azure ML Designer: Open the Azure ML Designer (no-code tool).
- Create a New Pipeline: Start a new classic pipeline project.
- Name Your Pipeline: Provide a name and description for your pipeline.
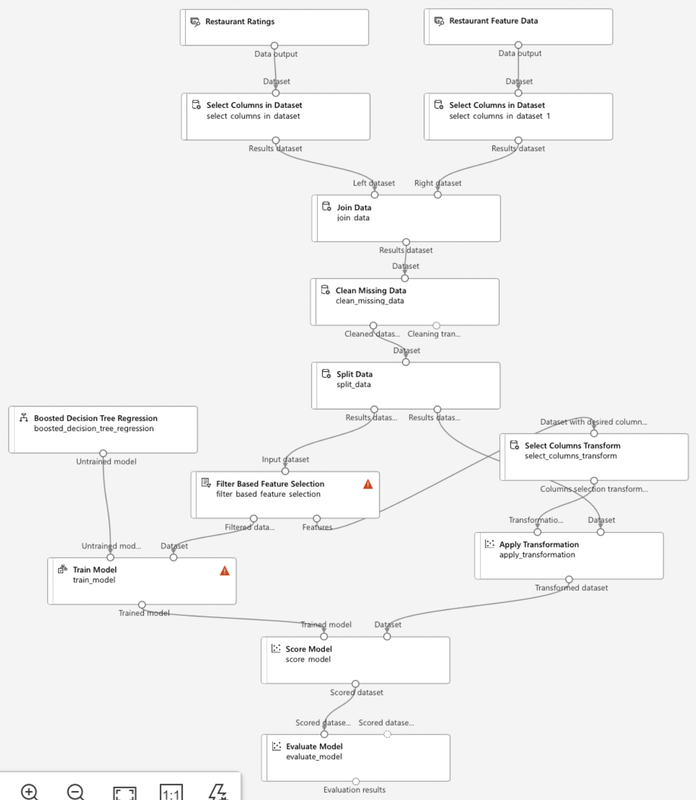
Data Ingestion:
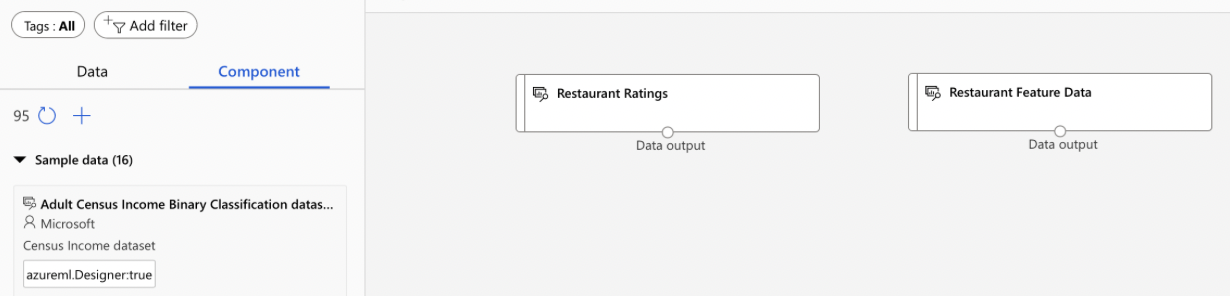
- Import Datasets: Import the required datasets into your pipeline using Drag and Drop.
- From Sample Datasets: Select datasets from the component section.
- Add to Pipeline: Drag and drop the datasets onto the pipeline canvas.
- Preview Data: Right-click on the datasets and select ‘Preview Data’ to examine the contents.
Data Wrangling:
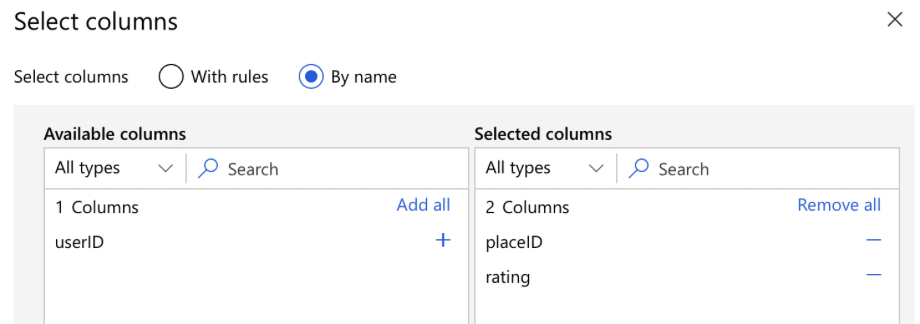
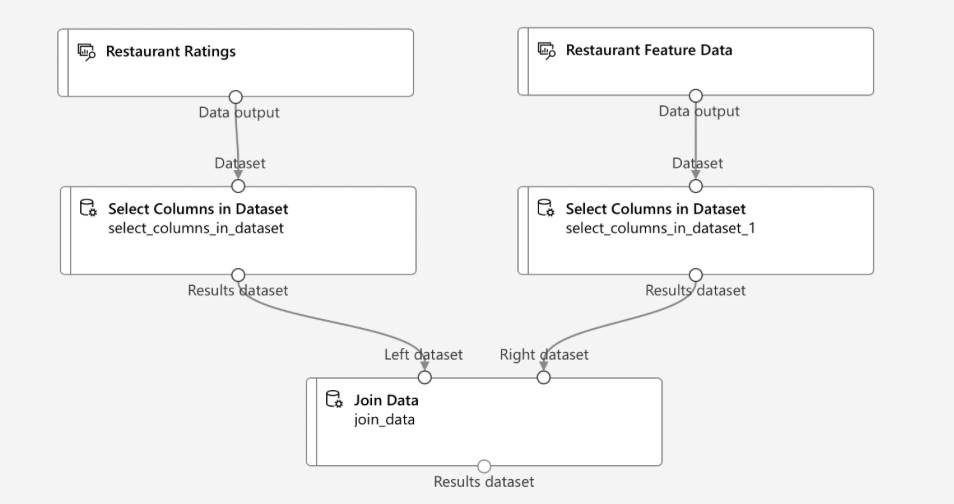
- Select Columns:
- Add ‘Select Columns in Dataset’ Module: Drag this module onto the canvas.
- Configure the Module: Select the columns you need from the dataset.
- Connect the Module: Link it to the dataset module.

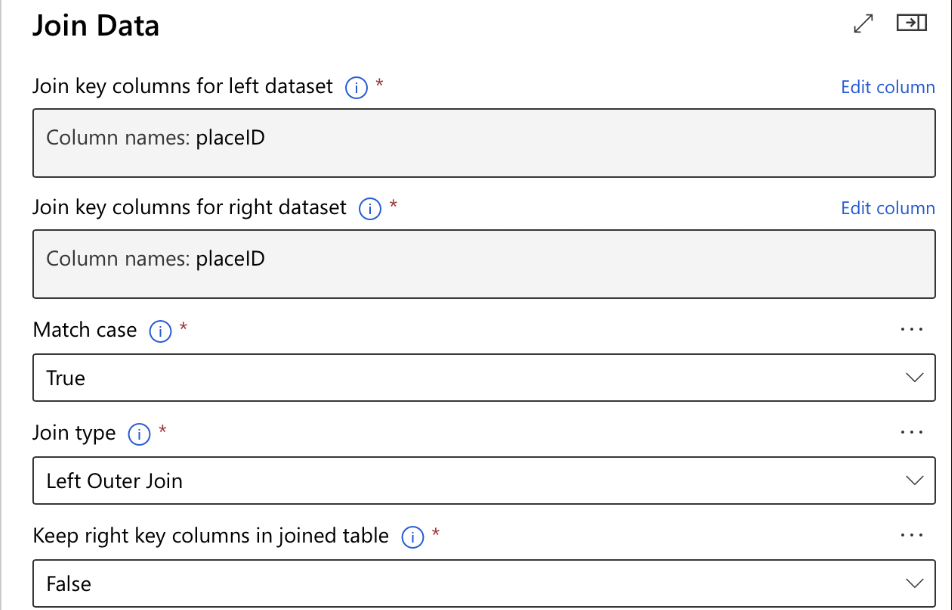
- Join Data:
- Add ‘Join Data’ Module: Drag this module onto the canvas.
- Configure the Join: Specify the columns to join on from each dataset.
- Connect the Datasets: Link both datasets to the ‘Join Data’ module.
- Clean Missing Data:
- Add ‘Clean Missing Data’ Module: Drag this module onto the canvas.
- Configure the Module:
- Cleaning Mode: Select the cleaning mode (e.g., remove entire row or column).
- Column Options: Specify which columns to clean or apply cleaning to all columns.
- Connect the Module: Link it to the ‘Join Data’ module.

- Submit Pipeline Job:
- Select Compute: Choose the compute resource you created earlier.
- Run the Pipeline: Submit the pipeline job to process the data.
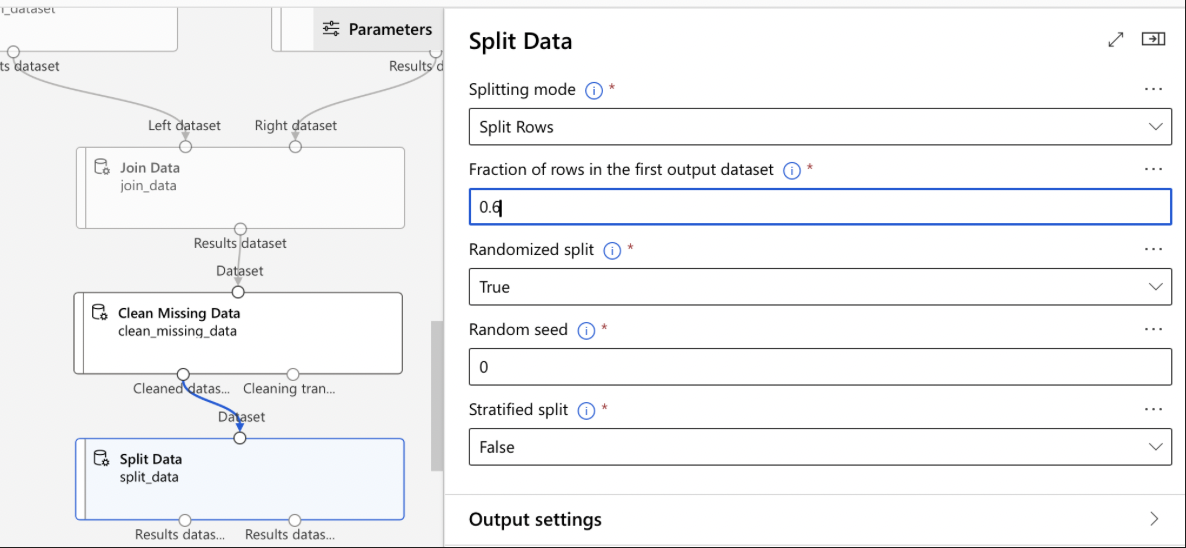
Split Data:
- Add ‘Split Data’ Module: Drag this module onto the canvas.
- Configure the Split:
- Fraction of Rows in First Output Dataset: Set the fraction to split the data into training and testing sets.
- Random Seed: Optionally, set a random seed for reproducibility.
- Connect the Module: Link it to the previous module in your pipeline.
Additional Data Wrangling and Modeling (if needed):
- Data Transformation: Add any required transformation modules to preprocess the data.
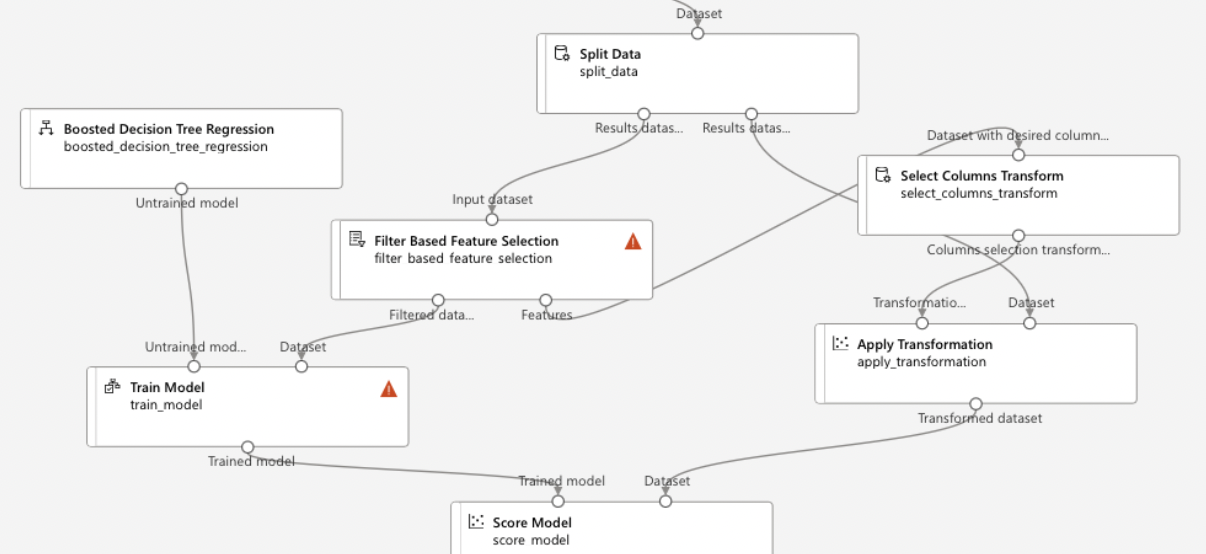
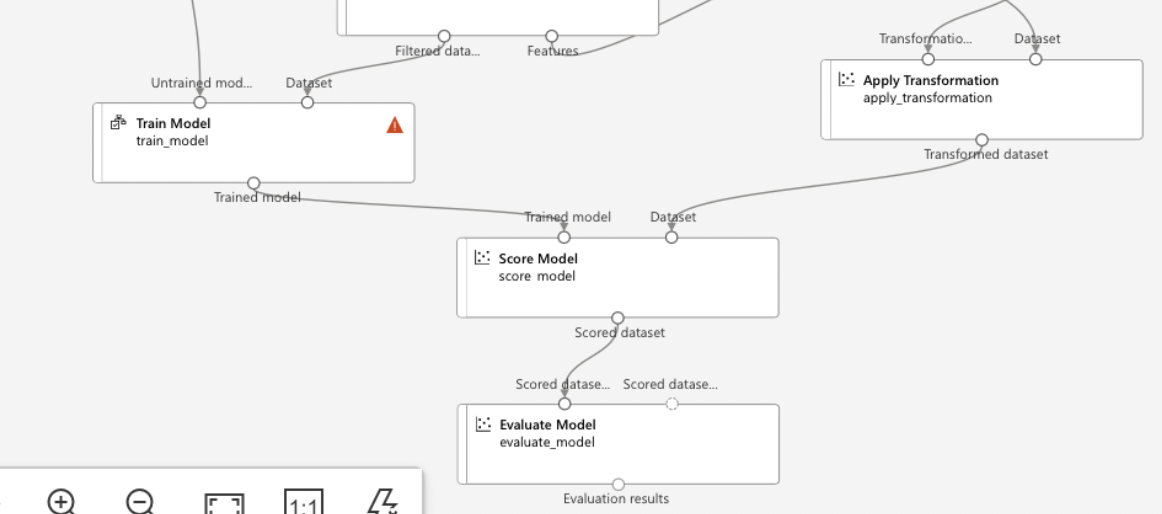
- Train Model:
- Add ‘Train Model’ Module: Drag it onto the canvas.
- Configure the Model: Select the algorithm and set parameters.
- Connect Training Data: Link the training data from the ‘Split Data’ module.
NOTE IMP:
Components options in Azure ML Designer:
- Preprocess Text: removes stop words from the text
- Split Data Component: splits data into two parts: train and test sets
- Extract N-Gram Features from Text & Convert Word to Vector component: transforms input text into features to make predictions on
- Evaluate Model:
- Add ‘Evaluate Model’ Module: Drag it onto the canvas.
- Connect to Trained Model and Test Data: Link the outputs from the ‘Train Model’ and ‘Split Data’ modules.
Run and Monitor the Pipeline:
- Submit the Pipeline: Run the entire pipeline by selecting the compute target.
- Monitor Progress: Track the progress and status of the pipeline run in Azure ML Studio.
- Review Results: Once the run is complete, review the results and metrics.
Publish the Pipeline:
- Set Up Published Pipeline:
- Select Publish Option: Choose to publish your pipeline.
- Name and Describe: Provide a name and description for the published pipeline.
- Pipeline Endpoint: Create or use an existing endpoint for the pipeline.
- Enable Authentication: Configure authentication and authorization settings.
- Publish: Finalize and publish the pipeline for use.
By following these steps, you will have created and published a basic machine learning pipeline in Azure ML Studio.